Wednesday, September 25, 2013

Bathroom Repairs


 Now here's a subject we mostly don't want to see or talk about until we need to fix something - then we're googling all over the place looking for answers.

I haven't posted any repairs lately, because, well, thankfully, I haven't had to do any!  But this one has been rolling around in my head for a while.

I have had some kind of leak from my toilet or the incoming water valve or maybe just from the tank sweating.  It was a mystery, but the floor was obviously showing signs of water absorption.

I called a friend to see if he knew of any carpenters in the area who could take a look at this.  He said he had done repairs like this and would be happy to inspect it and see what we should do.

Here are some before photos:


Actually I have seen worse than this, and it wasn't getting any worse - but I was sure there was some kind of monster under there.
My friend poked around and discovered some dry rot, but nothing was moist any more, so whatever it was wasn't happening any longer.  He offered to take the toilet off, inspect further and put on a new seal.  He also had a great idea for a plate of sorts that would level out the floor so the toilet sat level.


Gotta love the mind of a repairman.
This is made from a sheet of plywood that is stained.  Perfect fit!


For those of you with an older mobile home, this is a great fix as long you do not have major dry rot underneath your floor.  I once saw a similar fix with a steel plate.  This will probably last another 10 years.

Total time four hours.  New seal, bolts, plywood just under $40.
So I only got to play assistant on this one, but I am grateful that I was not the surgeon this time!!!
And so grateful for good friends!!  :)


Friday, September 20, 2013

Summers End

I haven't taken a vacation, let alone an over-nighter in seven years!  Some of that was due to low funds in the beginning of my New Pioneer adventure, later it was an unreliable vehicle that left me leery of going too far.  But in the past two years I have had a reliable new car and enough money for at least an over-nighter - some place.  However other things had to line up as well - like two days off in a row, near perfect weather and not during a holiday.  

Finally this month it all aligned and I was off to drive the "loop" as we call it out here.  It all happens on highway 101 and goes all the way around the Olympic Peninsula of Washington state.

I left from my place in Lilliwaup on the Hood Canal at 7:30am and headed north through Sequim and Port Angeles.  Then there's a lovely drive around Lake Crescent.


Next stop is Forks, filled up the gas and another quick 30 minutes to Ruby Beach, totaling 4.5 hours drive.


 There is something magical about Ruby Beach!  It has the coolest rock formations, pebbles, wildlife and spectacular views.  The sun was shining brightly and after the fog burned off it was 76 degrees!


Next stop just south of Ruby is Beach #4.  I do not know why they call it that.  It too has some fabulous rock formations and views.

Then it is back on the road for another hour and a half drive inland around the Quinault Indain Reservation, then out Moclips Highway back to the coast.

I reserved a room for one night at the cozy Sandpiper Beach Resort.


This was the view from my cabin.  I sat out on the deck till after sundown.


 Finally I got to see the sunset on the coast.  What took me so long, who knows, but I won't wait this long ever again. 

As a PS, it's only another 2.5 hour drive home from here around the southern end, through Aberdeen, then east to Shelton and back up 101 to home.

Wednesday, September 4, 2013

Those Final Projects


There's a section of my yard that you can't really see and I rarely visit there, but there it is and something needed to be done about it.  I had built a retaining wall of concrete blocks and planted a few things up top and called it good.

Recently I was inspired to make a few adjustments (of course that only came after some work I did on the hill which opened up the sunlight to this area.).  Below is the "before" picture.

 
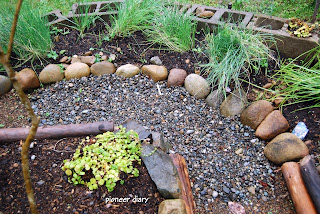
 I moved the flat wall out into a curved shape, filling it in with some excess dirt from another area, and then designing a mini labyrinth - of sorts.

Below is the "after" photo of the blocks moved out.


(Ignore that 1x2 in the foreground, it is marking the property line).

I went on to adding some chives and other plants that I knew would do well in this spot and don't mind getting moved around.

 Photo from the top.

 I wanted a small path and am filling it with rocks every chance I get to the beach.


I will be adding more ground covers to this area next.


There's even a little bird bath in case the wildlife back there was feeling left out.

One last thing I needed to do was to paint an L shape section of the back of the house that no one can see - except me of course.  So I got that taken care of as well, since I was working back there.

Below are the before and after shots of just one section, I don't have after photos for the rest of the area and of course I have already stacked up the project wood there.

 Before

 After
 This is what happens when the ex husband leaves the house unfinished and the pioneer woman is forced to figure out how to finish it - with no funds and what's available.  But I digress, and that was 8 years ago.  
Not bad considering I pieced together these odd siding panels before I bought a compact miter saw!

That's it for the summer to do's around here.... I think!  

Most Popular Posts